Pierogi are beloved dumplings that originated in Eastern Europe, particularly Poland, and have become popular worldwide. These dough pockets are typically filled with various savory or sweet ingredients, offering endless versatility and flavor. Making pierogi at home can be a fun and rewarding culinary adventure that allows you to tailor the fillings to your taste. Here’s how to create these traditional delights step by step.
What Are Pierogi?
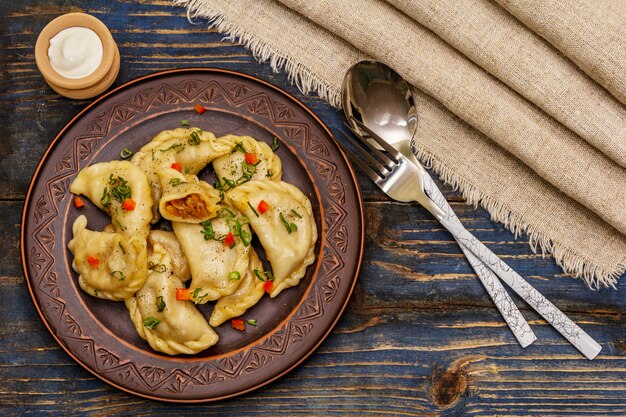
Pierogi are half-moon-shaped dumplings made from unleavened dough, usually filled with potatoes, cheese, meat, sauerkraut, mushrooms, or fruit. They can be boiled, pan-fried, or baked and are often served with toppings like sour cream, melted butter, or caramelized onions. While they are a staple in Polish cuisine, variations of pierogi are found in other European countries, each with its unique twist.
Essential Ingredients for Pierogi Dough and Fillings
For the Dough:
- 2 cups of all-purpose flour
- 1 large egg
- ½ cup of sour cream (for a tender dough)
- ¼ cup of unsalted butter (melted)
- Pinch of salt
For a Classic Potato and Cheese Filling:
- 2 large potatoes (peeled and cut into chunks)
- 1 cup of shredded cheddar cheese or farmer’s cheese
- 1 small onion (finely chopped and sautéed)
- Salt and black pepper to taste
Optional Toppings:
- Sour cream
- Caramelized onions
- Fresh herbs, such as dill or chives
Step-by-Step Guide to Making Pierogi
Step 1: Make the Dough
- In a large mixing bowl, combine the flour and a pinch of salt.
- Add the egg and mix until incorporated.
- Stir in the sour cream and melted butter. Mix until the dough starts to come together.
- Transfer the dough to a floured surface and knead for about 5 minutes until it becomes smooth and elastic.
- Wrap the dough in plastic wrap and let it rest at room temperature for at least 30 minutes. This resting period helps the dough relax, making it easier to roll out.
Step 2: Prepare the Filling
- Cook the potatoes in a pot of salted boiling water until tender, about 15–20 minutes. Drain and mash the potatoes in a bowl.
- Mix in the shredded cheese and sautéed onions until well combined. Season with salt and pepper to taste.
- Let the filling cool before using.
Step 3: Roll Out the Dough and Fill
- Divide the dough into two portions and roll out one portion on a floured surface to about ⅛-inch thickness.
- Use a round cookie cutter or a glass (about 3–4 inches in diameter) to cut circles from the dough.
- Place a small spoonful of filling in the center of each circle.
- Fold the dough over the filling to form a half-moon shape. Press the edges together and seal tightly using your fingers or a fork to crimp the edges.
Step 4: Cook the Pierogi
- Bring a large pot of salted water to a gentle boil. Drop the pierogi in batches, making sure not to overcrowd the pot.
- Cook for 3–4 minutes, or until the pierogi float to the surface. This indicates that they are cooked through.
- Remove the pierogi with a slotted spoon and place them on a plate.
Step 5: Optional Pan-Frying
- To add a golden, crispy texture, heat a skillet over medium heat with a bit of butter.
- Pan-fry the boiled pierogi until they are lightly browned on both sides, about 2–3 minutes per side.
Serve and Enjoy
- Serve the pierogi warm, topped with sour cream, caramelized onions, and a sprinkle of fresh dill or chives for added flavor.
Tips for Perfect Pierogi
- Dough Consistency: Ensure your dough is neither too sticky nor too dry. It should be pliable and easy to roll out without tearing.
- Sealing Tip: If you’re having trouble sealing the pierogi, moisten the edges of the dough with a bit of water before pressing them together.
- Freezing Option: Pierogi freeze well. Arrange uncooked pierogi on a baking sheet and freeze for about an hour. Once frozen, transfer them to a freezer bag for easy storage. Boil straight from the freezer when ready to cook.
Pierogi Filling Variations
- Savory Options: Sauerkraut and mushroom, ground meat with herbs, spinach and ricotta.
- Sweet Options: Sweetened cheese with raisins, blueberry, or strawberry fillings, typically served with a drizzle of sweet cream.
Why You Should Try Making Pierogi
Homemade pierogi are worth the effort for their comforting and hearty nature. Making pierogi allows you to experiment with different fillings and tailor the flavors to suit your preferences. They are perfect for family gatherings, holidays, or whenever you crave a hearty, homemade meal. With a few basic ingredients and a bit of patience, you can master this timeless dish and enjoy a piece of Eastern European culinary tradition.