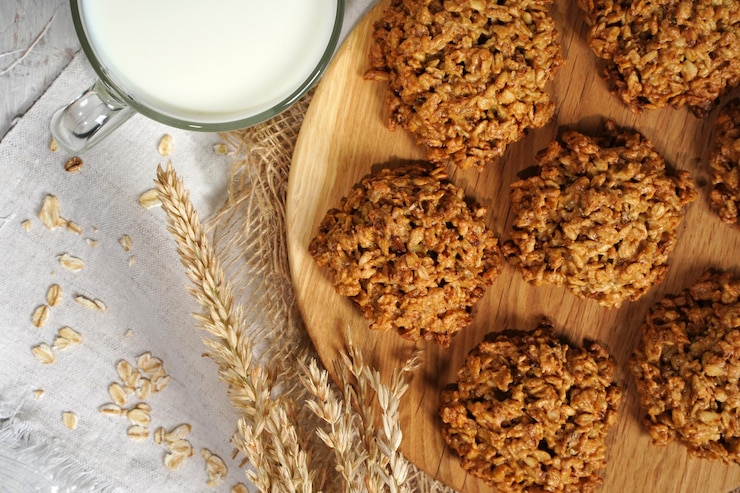
Few homemade treats have the comforting appeal of golden oat crunchies, especially when they emerge from the oven with crisp edges, a rich buttery aroma and a lightly chewy centre. The combination of rolled oats, coconut, golden syrup and butter creates the distinctive texture that makes these simple squares so difficult to resist. Getting the perfect crunch, however, depends on more than simply mixing the ingredients and putting the tray in the oven. The thickness of the mixture, oven temperature, baking time and cooling method all affect the final texture. A properly prepared batch should be golden without tasting burnt, crisp without becoming rock hard and firm enough to cut neatly. These classic oat treats are ideal for tea time, lunchboxes, bake sales or a simple homemade snack. Once you understand a few important baking techniques, you can consistently make golden oat crunchies with the satisfying crunch you want.
What Makes the Perfect Oat Crunchie?
The best oat crunchies have a balance of textures. The outside should be crisp and golden while the centre retains a slight chewiness. This contrast is what makes them more enjoyable than a biscuit that is simply hard from edge to edge.
The ingredients also play specific roles. Oats provide structure and texture, coconut contributes flavour and chewiness, butter adds richness and helps with browning, while golden syrup provides sweetness and contributes to the characteristic caramel-like flavour.
The thickness of the mixture matters as well. A thinner layer generally produces a crispier crunchie, while a thicker layer gives you a softer, chewier centre.
Your aim should be to spread the mixture evenly rather than simply pressing it into one part of the tray. An even layer allows the crunchies to bake at the same rate.
Golden Oat Crunchies Recipe
This recipe produces golden, crisp-edged crunchies with a slightly chewy centre. It uses simple pantry ingredients and is easy enough for everyday baking.
Ingredients
Makes approximately 16 to 20 squares.
- 180 g rolled oats
- 180 g cake flour
- 180 g brown sugar
- 180 g desiccated coconut
- 250 g butter
- 30 ml golden syrup
- 5 ml bicarbonate of soda
- 30 ml milk
- 2.5 ml salt
- 5 ml ground cinnamon, optional
Method
Preheat the oven to 180°C.
Line a 20 cm x 30 cm baking tin with baking paper, leaving some paper hanging over the edges to make removal easier.
Place the oats, flour, coconut, brown sugar, salt and cinnamon in a large mixing bowl.
Stir thoroughly to distribute the ingredients evenly.
Melt the butter and golden syrup together in a saucepan over low heat.
Do not allow the mixture to boil aggressively.
Mix the bicarbonate of soda with the milk in a small bowl.
Remove the butter mixture from the heat.
Add the bicarbonate of soda and milk mixture to the warm butter and syrup.
Stir carefully as the mixture may foam.
Pour the warm butter mixture into the dry ingredients.
Mix until all the dry ingredients are evenly coated.
Transfer the mixture to the prepared baking tin.
Press it firmly and evenly into the tin using the back of a spoon or a flat measuring cup.
Bake for approximately 22 to 28 minutes, or until evenly golden brown.
Check the crunchies during the final few minutes because the edges can darken quickly.
Remove from the oven.
Allow the mixture to cool slightly.
Cut into squares while still warm but firm enough to hold their shape.
Leave the crunchies in the tin until completely cool before removing them.
The Secret Is in the Oats
Rolled oats are one of the most important ingredients for achieving the right texture. They provide a noticeable oat texture and help create the characteristic crunch associated with homemade crunchies.
Avoid replacing all the rolled oats with very fine instant oats. Fine oats absorb moisture differently and can produce a softer, denser texture.
You can use traditional rolled oats for a more substantial crunch. If you prefer a slightly finer texture, you can combine rolled oats with a smaller amount of finer oats.
The oats should be evenly distributed throughout the mixture. This prevents areas of the crunchie from becoming excessively dense or crumbly.
Why Golden Syrup Matters
Golden syrup provides more than sweetness. It contributes to the rich caramel-like flavour and helps create the texture that makes traditional crunchies distinctive.
The syrup also works with the butter and sugar during baking to encourage browning.
You can replace golden syrup with honey in some variations, but the flavour will change. Golden syrup gives the crunchies their familiar taste.
Do not add excessive syrup in an attempt to make the crunchies sweeter. Too much moisture can change the texture and make the finished squares softer.
Getting the Perfect Crunch
The biggest secret to crunchy oat squares is controlling moisture. The mixture needs enough moisture to bind the oats and coconut together, but not so much that the finished bake remains soft.
Baking also removes moisture from the mixture. This is why the crunchies become firmer as they cool.
If your crunchies are too soft, they may need a little more baking time. However, avoid simply leaving them in the oven until they become very dark because they can develop a bitter flavour.
Some recipes use a lower temperature and a longer drying period to encourage a crisp texture. One method involves baking until lightly golden and then returning the cut crunchies to the switched-off oven for additional drying.
This approach can be useful if you prefer a particularly crisp crunchie.
Why the Baking Tin Matters
The size of your baking tin directly affects the thickness of the crunchies.
A large rectangular tray creates a thinner layer, which generally results in a crispier bake. A smaller square tin creates a thicker layer with more chew in the middle.
If you want crisp crunchies, spread the mixture into a wider tin.
If you prefer a softer centre, use a slightly smaller tin.
Do not make the layer excessively thin. Very thin crunchies can brown too quickly and become hard or bitter around the edges.
Aim for an even thickness across the entire tray.
How to Press the Mixture Correctly
Pressing the mixture into the tin helps the crunchies hold together after baking. However, you should not compact it so aggressively that the oats become compressed into a dense slab.
Use the back of a spoon, spatula or flat measuring cup.
Start from the centre and work towards the edges.
Pay particular attention to the corners because loose mixtures often collect unevenly there.
The surface should be relatively flat.
An even surface helps the entire tray brown at approximately the same rate.
Avoiding Burnt Edges
Sugar, golden syrup and butter encourage browning, which is desirable until the mixture goes too far.
Keep an eye on the crunchies during the final stages of baking.
If the edges become dark while the centre still needs time, reduce the oven temperature slightly or cover the tray loosely with foil.
Rotating the tray during baking can also help if your oven has hot spots.
Do not judge doneness only by the colour of the edges. Look for an overall golden-brown surface.
Remember that the crunchies continue to firm as they cool.
When Should You Cut Oat Crunchies?
Timing matters when cutting the baked mixture.
If you wait until it is completely cold, the crunchies may become too firm to cut neatly without breaking.
If you cut them immediately after removing them from the oven, they can be too soft and may fall apart.
The ideal point is when the tray has cooled enough for the mixture to hold together but is still warm.
Use a sharp knife to mark and cut the squares.
Once completely cool, carefully remove the pieces from the tray.
Classic Coconut Oat Crunchies
Coconut is a traditional ingredient in many oat crunchie recipes and contributes both flavour and texture. A classic version can be made with a simple combination of oats, flour, coconut, sugar, butter and golden syrup.
Ingredients
Makes approximately 20 squares.
- 230 g rolled oats
- 340 g cake flour
- 200 g desiccated coconut
- 275 g sugar
- 375 g butter
- 45 ml golden syrup
- 30 ml milk
- 10 ml bicarbonate of soda
- 1 g salt
Method
Preheat the oven to 180°C.
Grease and line a large baking tray.
Combine the oats, flour, coconut, sugar and salt.
Melt the butter and golden syrup together.
Mix the bicarbonate of soda with the milk.
Add the milk mixture to the warm butter mixture.
Stir until it foams slightly.
Add the wet mixture to the dry ingredients.
Mix thoroughly.
Press the mixture firmly and evenly into the prepared tray.
Bake for approximately 30 minutes, watching carefully towards the end.
Allow to cool slightly.
Cut into squares while still warm.
Allow the crunchies to cool completely before removing them from the tray.
Chocolate Drizzled Crunchies
Chocolate adds a rich finish to traditional oat crunchies without changing the basic recipe.
Bake and cool the crunchies completely.
Melt approximately 100 g of dark or milk chocolate gently.
Drizzle the chocolate over the cooled crunchies.
Allow the chocolate to set before cutting or serving.
Dark chocolate works particularly well because its bitterness balances the sweetness of the golden syrup and sugar.
Nutty Oat Crunchies
For additional texture, add nuts to the basic mixture.
Chopped pecans, almonds or walnuts all work well.
Add approximately 80 g of chopped nuts to the dry ingredients before combining everything.
Avoid using very large pieces because they can make the crunchies difficult to cut.
For an extra toasted flavour, lightly toast the nuts before adding them to the mixture.
Allow them to cool completely before incorporating them into the batter.
Seeded Oat Crunchies
Seeds offer another easy way to change the texture of your crunchies.
Try a combination of pumpkin seeds, sunflower seeds, sesame seeds and linseeds.
Use approximately 100 g of mixed seeds in place of some of the coconut.
Stir the seeds through the dry ingredients.
The result is a nuttier, more textured crunchie that works particularly well as a lunchbox snack.
How to Store Homemade Crunchies
Crunchies need protection from moisture once they have cooled.
Place completely cooled pieces in an airtight container.
Keep them at room temperature in a cool, dry cupboard.
Do not place warm crunchies into a sealed container because trapped steam can soften the texture.
If stored correctly, they can remain enjoyable for several days.
Separate layers with baking paper if you stack them to prevent sticking.
Common Oat Crunchie Mistakes
One of the most common mistakes is using the wrong tin size. A very thick layer can remain soft in the middle, while an extremely thin layer can brown too quickly.
Another mistake is overmixing or handling the mixture too aggressively. Mix until the ingredients are evenly combined and then press the mixture into the tray.
Using too much liquid can also produce a softer texture.
Removing the crunchies from the oven too early can leave the centre underbaked.
On the other hand, baking for too long can result in a bitter, overly hard product.
Finally, do not rush the cooling process. The crunchies need time to firm up and develop their final texture.
Easy Ways to Serve Golden Crunchies
Golden oat crunchies are excellent with tea or coffee. Their crisp texture makes them particularly satisfying alongside a hot drink.
They also work well in lunchboxes because individual squares are easy to pack.
For afternoon tea, arrange them on a serving plate with fresh fruit and other homemade treats.
You can also crumble a crunchie over plain yoghurt for a quick dessert-style snack.
For a more indulgent option, serve a warm crunchie with a scoop of vanilla ice cream.
The simple oat base makes these treats versatile enough for everyday snacking and special occasions.
The secret to golden oat crunchies with the perfect crunch lies in the balance between ingredients, thickness, baking time and cooling. Rolled oats provide the texture, while coconut adds flavour and golden syrup contributes sweetness, browning and that familiar caramel note. Pressing the mixture evenly into the correct-sized tin helps ensure that the edges and centre bake at a similar rate. A properly heated oven is essential, but you should watch the crunchies closely towards the end because the sugar and syrup can cause rapid browning. Cutting the bake while it is slightly warm allows you to create neat squares before the mixture becomes firm. Proper cooling and airtight storage then help preserve the crisp texture that makes homemade crunchies so enjoyable. Once you master these details, you can confidently experiment with nuts, seeds, chocolate and spices while still achieving the golden, satisfying crunch that makes this classic bake a favourite.